
Replace the Driver's Power Master Window Switch on a 2013-2015 Subaru Outback
Swap out a failed front-left driver's side power master window switch (Subaru part 83071-AJ240) on a 2013, 2014, or 2015 Subaru Outback — pop the door-panel switch bezel, unplug the old switch, fit the new one, and reinitialize the auto up/down window.
The automatic window function is controlled by the driver master window switch. On a 2013-2015 Subaru Outback, replace part 83071-AJ240, reconnect the battery, then reinitialize the auto up/down function and test all window positions.
Watch: How to Replace a Subaru Outback Window Switch
Remove the door panel carefully, swap the master switch, and test all four windows. · 3:45 minute walkthrough. The full written steps are below.
Subaru automatic window switch replacement
What many owners call the automatic window is the power-window system controlled by the driver master switch. This guide covers the 2013-2015 Subaru Outback front-left master window switch, part 83071-AJ240.
Before you start
- Confirm the model year and part number before ordering.
- Disconnect the battery before working on the switch.
- Pry the bezel carefully and release the connector by its latch.
- Reinitialize the automatic window function before final assembly.
Common failure points
- Do not pull the bezel by the switch button.
- Do not force the connector latch.
- If multiple windows fail, the fault may be wiring or the motor rather than the switch.
Keep learning
- Change a Car BatteryRelated vehicle electrical work.
- Install a Hidden Kill SwitchAnother automotive electrical project.
- Subaru Outback Window Switch GuideRead the complete replacement sequence.
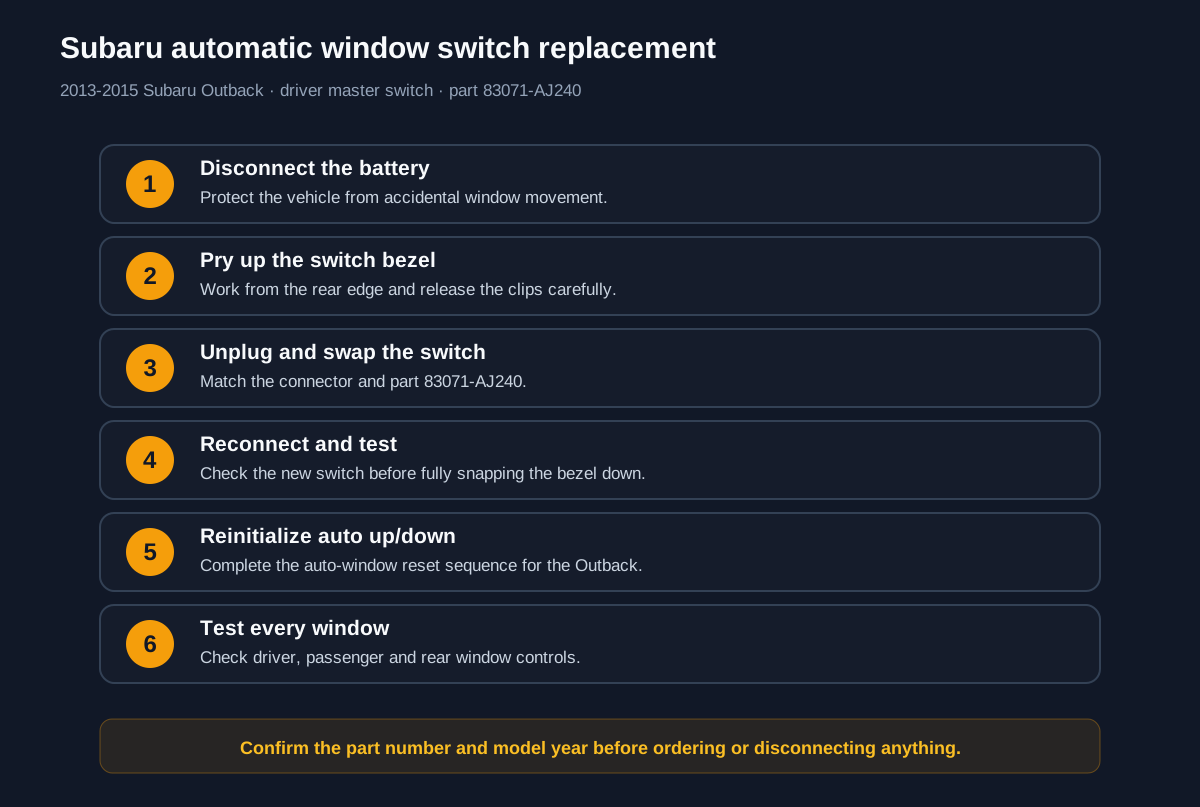
Visual step map
See the full sequence before you start, then check off each step as you go.
0 of 6 steps checked
Materials and cost planner
Select the items you plan to buy, adjust any estimated price, and calculate the selected total.
Editable rough U.S. retail estimates. Estimated all listed: $163.00. Prices are planning estimates, not quotes — tax, store, brand, size and quantity will change them.
Time and finish planner
Estimate active working time from the number of steps in this guide.
Trip fuel cost calculator
Estimate fuel cost for a trip using distance, efficiency and current fuel price.
Real-world MPG changes with speed, load, terrain, weather and tire pressure.
- Read the tools, materials, safety notes, and steps below for free.
- Tap See 20-second demo if you want to understand it first.
- Tap Start Camera Coach when you want hands-free help, or Voice-only if you do not want to use the camera.
- Allow camera and microphone. Point your phone at the work; the coach watches your progress and tells you the next step.
🧰 Required Tools & Equipment
- ✓ Plastic trim-removal (pry) tool — a flat nylon one, not a screwdriver
- ✓ Phillips #2 screwdriver
- ✓ Small flat-blade screwdriver (for connector locking tabs)
- ✓ 10 mm wrench (battery negative terminal)
- ✓ Flashlight
📦 Materials & Supplies
- ✓ Replacement power master window switch, Subaru part 83071-AJ240 (front left / driver side, 2013-2015 Outback)
- ✓ Painter's tape (to protect the door panel edge while prying)
⚠️ Safety Checkpoints & Warnings
- • Confirm the replacement is 83071-AJ240 and that your Outback is a 2013, 2014, or 2015 model — the 2010-2012 and 2015+ Legacy/Outback switches have different connectors and will not plug in.
- • Disconnect the battery negative (-) terminal before unplugging the old switch so you don't short the window motor circuit or blow the power-window fuse.
- • Pry only with a plastic trim tool. A metal screwdriver will gouge the door panel and can crack the bezel clips.
- • Keep hands clear of the window opening while testing — an auto-up window closes with real force.
📋 Step-by-Step Guide (6 Steps)
Disconnect the Battery and Note Your Radio Presets
Open the hood and loosen the 10 mm nut on the battery's negative (-) terminal, then lift the clamp off the post and tuck it aside so it can't touch the terminal. Write down your radio presets and clock first — they will reset.
- • Negative clamp is fully off the post and resting away from it
- • Dash lights and dome light are dead when a door is opened
- • Loosening the positive (+) terminal instead of the negative
- • Leaving the loose clamp resting against the post so it reconnects when the car is bumped
Pry Up the Switch Bezel From the Rear Edge
Open the driver's door. The master switch sits in a bezel set into the top of the armrest. Lay painter's tape on the panel along the back (toward the seat) edge of the bezel, slide the plastic trim tool into the seam at that rear edge, and lever up gently. Work forward along both sides — the bezel is held by spring clips and lifts out with no screws from the outside.
- • Rear edge of the bezel pops up with a click and the clips are visible
- • Bezel lifts free of the armrest but is still tethered by its wiring harness
- • Prying from the front (door-latch) edge, where the bezel is hooked under the panel — that is the end that comes out last
- • Yanking the bezel straight up and out, stretching the harness
Unplug the Old Switch
Turn the bezel over. On the underside of the switch you'll find the wiring connector (on this switch there is one large multi-pin connector; some units have a second smaller one). Press the locking tab on each connector with your thumb or the small flat-blade screwdriver and pull the plug straight off — not at an angle.
- • Connector comes off with no bent pins showing on either side
- • Bezel and switch are now completely free of the door
- • Pulling on the wires instead of the connector body
- • Forcing the connector without depressing the lock tab
Remove the Switch From the Bezel and Fit the New One
Flip the bezel over. The switch is held to the bezel by Phillips screws on the underside (typically two) and/or plastic snap tabs. Remove the screws, release any tabs, and lift the old switch out through the top of the bezel. Seat the new 83071-AJ240 in the same orientation — the window-lock button toward the rear, the four window rockers matching the door layout — and reinstall the screws snug, not tight.
- • New switch sits flush in the bezel with no gap at any edge
- • Screws are back in and the switch doesn't rock when pressed
- • Installing the switch rotated 180°, so the driver rocker ends up at the back
- • Overtightening and stripping the plastic screw bosses
Plug In, Reconnect the Battery, and Test Before Snapping the Bezel Down
Push the connector onto the new switch until the lock tab clicks. Leave the bezel resting loose in its opening. Reconnect the battery negative terminal and tighten the 10 mm nut. Turn the key to ON and test every rocker: driver, passenger, both rears, and the window-lock button. If anything doesn't respond, you can still reach the connector.
- • All four windows go up and down from the master switch
- • Window lock button disables the passenger switches when pressed
- • Clipping the bezel down first, then finding a dead rocker and having to pry it all up again
- • Reconnecting the battery before the connector is fully seated
Reinitialize the Auto Up/Down Window and Snap the Bezel Home
With the key ON, press and hold the driver's window rocker DOWN until the window is fully open, then keep holding for about 5 seconds. Then pull the rocker UP and hold until the window is fully closed, and keep holding another 5 seconds. Release. Tap the rocker once briefly in each direction — the window should now travel fully on a single tap. Finally, hook the front edge of the bezel under the panel and press the rear edge down until every clip clicks.
- • One quick tap up or down runs the driver's window all the way
- • Bezel sits flush with the armrest all the way around with no lifted corner
- • Releasing the rocker the instant the window reaches the end of travel instead of holding the extra seconds
- • Pressing the bezel down before the harness is tucked, pinching a wire
Frequently asked questions
Why did my Subaru automatic window stop working?
A failed driver master switch can stop the auto up/down function even when other parts of the window system still work. The fault can also be in the wiring, motor or regulator, so test the switch behavior before ordering parts.
How do I reset the automatic window on a Subaru Outback?
After the switch is replaced and the battery is reconnected, perform the model-specific auto up/down reinitialization sequence. The guide covers the reset step and confirms the sequence before the bezel is fully reassembled.
Do I need to remove the Subaru Outback door panel?
For this 2013-2015 Outback master-switch replacement, the guide removes the switch bezel rather than the entire door panel. Work carefully around the plastic clips and connector latch.
What part number fits a 2013-2015 Subaru Outback master window switch?
This guide covers Subaru part 83071-AJ240. Confirm the model year, trim and connector before ordering because vehicle parts can vary.